1HP Cold Plunge Chiller Setup & Maintenance
Need help getting started? This step-by-step guide makes setting up your 1HP cold plunge chiller simple and fast — available in both video and written form.
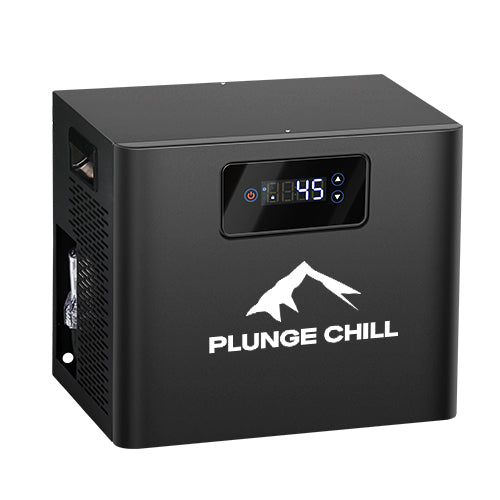
1HP Water Chiller Screen SAME TO 1/3HP Water Chiller
In this video, we’ll walk you through how to use and set up the screen functions on your Cold Plunge Chiller.
1.🔌Power On the Chiller
✅ Plug in the chiller.
✅ Press and hold the power button .
✅ Once on, the screen will display the current water temperature.
💤 If the display shows “OFF”, the unit is in standby mode.
2. 🌡 Set Target Temperature to 45°F (Maintain Between 45°F–50°F)
• Use the up and down buttons to set the temperature to 45°F.
• Press and hold the up and down buttons together to enter F01 mode, then set it to 5°F.
• Press the power button to confirm the setting.
• This setup ensures the water stays between 45°F and 50°F.
3. 📺 Screen Status
Indicators & Panel Lock
⏳ Delay Mode:
• After powering on, the chiller may have a 3-minute delay before starting.
• A blinking fan icon means it’s in delay mode.
🔒 Locked Panel:
• If there’s a lock icon on the screen, the panel is locked and settings can’t be changed.
🔓 Unlock the Panel:
• Press and hold the power button + down button ▼ at the same time to unlock.
Function Introduction

Install 1HP Water Chiller with Bathtubs (with ports)
1HP Cold Plunge Chiller Installation
Follow these steps to ensure proper installation and water circulation.
🔧 Step 1: Install the External Pump and Filter
- Secure the pump and filter onto the metal base using screws.
- Identify Pump IN and Pump OUT ports on the filter housing.
- Insert the air release valve into the top port of the filter to release trapped air during operation.
💧 Step 2: Connect the Hoses
Correct hose connections are essential for proper water flow:
- Short Hose: Connect Pump OUT → Chiller IN.
- Long Hose #1: Connect Chiller OUT → Tub Inlet.
- Long Hose #2: Connect Tub Outlet → Filter IN.
Connector Tips:
- Choose male/female connectors that match your bathtub ports.
- Some tubs include shut-off valves; these are not included with the chiller.
- Push connectors firmly and wrap with waterproof tape to prevent leaks.
⚡ Step 3: Start the Chiller
- Plug the pump into the chiller’s power port.
- Open the bathtub valves to allow water to fill the filter.
- Close the air release valve once the filter is full.
- Turn on the chiller; the pump will start automatically.
- Run briefly and check that water circulates properly.
🔄 Water Flow Direction
Ensure correct water flow for efficient cooling:
Tub Outlet → Filter IN → Filter OUT → Pump IN → Pump OUT → Chiller → Tub Inlet
💡 Tips & Notes
- Use the submersible pump for bathtubs without ports.
- Wrap threaded connections with waterproof tape.
- Avoid twisting or bending hoses.
- Verify all connectors are tight before starting the chiller.
Install 1HP Water Chiller with Home Bathtubs (no ports)
🧰 Hose Setup
There are 3 insulated hoses, each with a specific role:
- Short Hose A (with fittings): Pump OUT → Chiller IN
- 3/4 inch female end → Chiller IN port
- 1/2 inch female end → Pump OUT port
- Long Hose B (with fittings): Chiller OUT → Tub
- Place the other end directly into the bathtub
- Long Hose C (without fittings): Tub (Submersible Pump) → Filter IN
- One end → Filter IN port
- Other end → Submersible Pump OUT port (fully submerged)
Wrap threads with waterproof tape for a better seal and tighten all connections securely. Avoid twisting or sharply bending hoses.
🔧 STEP 1: Install the External Filter Pump System
- Insert the filter and pump into the filter housing.
- Use the screwdriver and screws to fix the filter and pump onto the base.
🔄 STEP 2: Connect the 3 Hoses
- Connect Short Hose A → Pump OUT & Chiller IN
- Connect Long Hose B → Chiller OUT → Tub
- Connect Long Hose C → Submersible Pump → Filter IN
- Make sure the submersible pump is fully submerged in water.
⚡ STEP 3: Start Your 1HP Chiller
- Plug the pump power cable into the chiller’s power port.
- Make sure the filter valve is closed.
- Start the chiller; the pump will run automatically.
- Let it run briefly and check water circulation.
🔄 Water Flow Direction
Tub (Submersible Pump) → Filter IN → Filter OUT → Pump IN → Pump OUT → Chiller → Tub
💡 Installation Tips
- If the hose connected to the pump already has a male connector, cut off a small section of the hose to make it easier to fit onto the pump.
- You can use a hair dryer to gently warm and soften the hose—this makes it much easier to attach.
- Wrap threaded connections with waterproof tape.
- Avoid twisting or sharply bending hoses.
- Ensure all connectors are tight before starting the chiller.
✅ Note
Trimming the hose won’t affect your return or warranty service.
Troubleshooting
Please check if the machine is locked,The screen control will be auto. locked after 30 seconds without operation. To unlock the screen, long-press and hold the Power and Down buttons together for 5 seconds.
Please check all of the following:
1.The ambient temperature is too high.
Keep the ambient temperature below 35 degrees and ensure good ventilation.
2.The chiller is placed inside a closed cabinet.
Please place the chiller on an open, flat surface to ensure good ventilation.
3.The water volume exceeds the cooling capacity.
Reduce the water volume or replace with a chiller with a higher cooling capacity.
4.The water in the tub cannot cool down
Check if the water circulation is functioning properly.
Please check all of the following:
1. Pump not working or not powered.
Unplug and plug the pump back in. Make sure it runs normally.
2. Twisted or bent pipe.
Straighten the pipe to allow smooth water flow.
3. Air trapped in the the filter.
Open the filter air valve to release air, then close it.
4. Low water level.
Add water until the pump and filter circulate properly.
5. Wrong pump/filter direction.
Check water flow: Tub Outlet → Filter In → Filter Out → Pump In → Pump Out → Chiller.
6. Weak water circulation.
Ensure the ice pod valve is fully open.
7. Clogged filter cartridge.
Clean or replace the cartridge regularly to restore flow.
1. Pipes are bent or partially blocked
Straighten the water pipes and remove any visible blockage to allow smooth flow
2. Pump or filter contains debris
Open the pump and filter inlet, remove any debris, and clean thoroughly
3. Filter cartridge is clogged
Clean or replace the filter cartridge regularly to restore water flow
4. Air trapped in the filter
Open the air valve on the filter to release trapped air, then close it
Manual
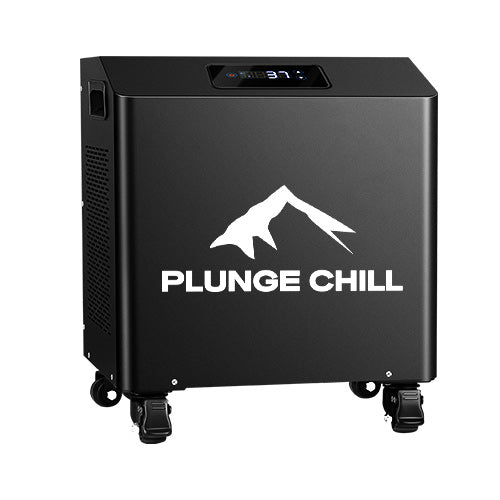
The 1HP Cold Plunge Chiller is built for fast, continuous cold therapy, helping speed up recovery and boost cold therapy benefits.
Its robust construction and user-friendly interface make it suitable for:
- Home gyms & personal recovery setups
- Pro athletes & training centers
- Physical therapy & rehab clinics
- Wellness retreats & spa environments
- Research labs exploring cold therapy science
Whether you're recovering after a tough workout or establishing a daily wellness routine, the 1HP Cold Plunge Chiller provides consistent performance and fast cooling, so you can stay refreshed, restored, and ready for more.
1. Cooling Performance
✧ Max Cooling Power: 2600W (1 HP compressor)
✧ Cools up to 110 gallons from 80°F to 40°F in about 8 hours
✧ Reaches as low as 36°F without the need for ice
2. Dimensions & Weight
✧ Size: 16.5" (L) × 13.8" (W) × 18.9" (H)
✧ Weight: 73 lbs
✧ Equipped with caster wheels for easy mobility
3. Core Components
✧ Compressor: High-efficiency Japanese brand
✧ Heat Exchange: Commercial-grade 20-ft titanium coil + aluminum condenser (made in USA)
✧ Refrigerant: R410A (eco-friendly and high-performance)
4. Filtration System
✧ Built-in inline filter with 1-micron precision
✧ Air valves for improved water flow and pressure balance
5. Digital Controls
✧ LED display with intuitive 3-button interface
✧ Auto lock screen to prevent accidental adjustments
✧ Safety shutoff for overheat and abnormal power conditions
6. Pump Compatibility
✧ Supports dual-pump setup: compatible with both built-in and submersible pumps
✧ Works with household bathtubs (indoor use) and plunge tubs (outdoor use)
7. Safety & Maintenance
✧ Reset switch for circuit protection on the rear
✧ One-button drain and venting system for easy maintenance
✧ Long-lasting filter cartridge for extended use
8. Indoor & Outdoor Use
✧ Weather-tested casing for year-round outdoor use
✧ Compact footprint fits easily in home bathrooms or patios
✧ Plug-and-play setup—no special tools required
- 1 x Water Chiller Unit
- 1 x External Filter & Pump System
- 3 x Insulated Water Pipe
- 1 x Water chiller Install Kit
- 1 x Submersible Pump
- 1 x Manual Guide
- Set your ideal precise temperature via the touchscreen
- The pump draws water to the chiller and cools to your set temperature
- The cooled water is recirculated back into the tub
- It automatically maintains your set temperature energy efficiently 24/7
- Delay cooling to minimize energy usage
