
Ultra 1HP ChillerSetup & Support
- Step-by-step setup and operating instructions
- Connection guides for tubs with or without ports
- Troubleshooting and routine maintenance tips
- Step-by-step tub and chiller setup instructions
- Chiller controls and temperature settings
- Troubleshooting and routine maintenance tips
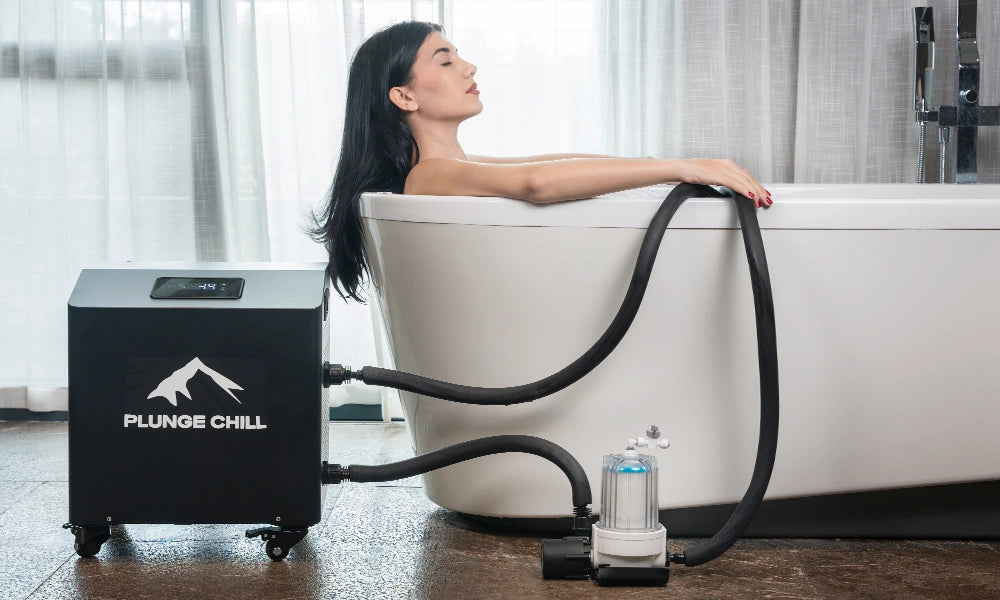

Set Up Your Complete Plunge System
Follow these three steps to get started: set up your tub, connect your Ultra 1HP Chiller, and set your desired water temperature.
Watch the video and follow the setup steps for your PRO or PLUS tub.
1. Unfold the Tub
Remove the tub and lid from the carry bag. Unfold the tub and prepare the included air pump.
2. Inflate the Tub
Unscrew the air valve cap, press the valve button, and attach the air pump hose. Inflate the tub as shown in the video.
3. Inflate the Lid and Accessories
Repeat the same steps to inflate the lid. For the PLUS tub, inflate the included step stool as well.
View Included Parts & Tub GuidesWatch the video and follow the setup steps for your PRO or PLUS tub.
1. Unfold the Tub
Remove the tub and lid from the carry bag. Unfold the tub and prepare the included air pump.
2. Inflate the Tub
Unscrew the air valve cap, press the valve button, and attach the air pump hose. Inflate the tub as shown in the video.
3. Inflate the Lid and Accessories
Repeat the same steps to inflate the lid. For the PLUS tub, inflate the included step stool as well.
View Included Parts & Tub Guides1. Connection Instructions
Watch the video and follow the steps below to connect your Ultra 1HP Chiller to your tub.
First hose — No pre-installed connectors:
Connect the tub’s OUT port to the filter’s IN port using the appropriate included fittings.
Second hose — Two pre-installed connectors:
Connect the external pump’s OUT port to the chiller’s IN port, with the L-shaped connector attached to the chiller.
Third hose — One pre-installed connector:
Attach the L-shaped connector to the chiller’s OUT port. Connect the open end to the tub’s IN port using the appropriate included fitting.
Make sure a white O-ring is seated inside each L-shaped connector before attaching it to the chiller.
2. How It Works
Water flows from the tub’s OUT port through the external filter and circulation pump, then enters the chiller’s IN port. The cooled water leaves through the chiller’s OUT port and returns to the tub through the tub’s IN port.
Set Your Water Temperature
Power On & Off
Follow the video to turn your Ultra 1HP Chiller on and off using the control panel.
Choose Your Temperature
Use the control panel to set your desired water temperature. Follow the video for step-by-step instructions.
Understand Automatic Cooling
Cooling stops when the water reaches your set temperature and restarts when it rises by the F01 temperature differential (5°F by default).
Need help? Email support@plungechill.com with your model and a short video, or call +1 305 326 3656.
Setup Videos & Instructions
Control Panel Guide
Power On & Off
Follow the video to learn how to turn the chiller on and off using the control panel.
Set Your Temperature
Use the control panel to set your desired water temperature. Follow the video for step-by-step instructions.
Unlock the Control Panel
If the controls are locked, press and hold the Power and Down buttons together for about 5 seconds to unlock them.
Installation for Bathtub (with ports)
Connection Instructions
First hose — No connectors on either end
Connect one end to the tub’s OUT port using the appropriate included fitting, and attach the other end to the filter’s IN port.
Second hose — Two pre-installed connectors
Connect the external pump’s OUT port to the chiller’s IN port, with the L-shaped connector attached to the chiller.
Third hose — One pre-installed connector
Attach the L-shaped connector to the chiller’s OUT port. Connect the open end to the tub’s IN port using the appropriate included fitting.
Make sure a white O-ring is seated inside each L-shaped connector before attaching it to the chiller.
How It Works
Water flows from the tub’s OUT port through the filter and external pump, then enters the chiller’s IN port. Once cooled, it returns to the tub through the chiller’s OUT port and the tub’s IN port.
Tips
- Make sure the tub’s IN and OUT valves are fully open and the hoses are free of kinks.
- Release trapped air from the filter before first use. See “How do I release trapped air from the system?” in the Troubleshooting section below.
- Keep the filter’s top air release valve closed during normal operation, and check all connections for leaks.
Installation for Home Bathtub (no ports)
Connection Instructions
First hose — No connectors on either end
Attach one end to the submersible pump and the other end to the filter’s IN port.
Second hose — Two pre-installed connectors
Connect the external pump’s OUT port to the chiller’s IN port, with the L-shaped connector attached to the chiller.
Third hose — One pre-installed connector
Attach the L-shaped connector to the chiller’s OUT port and place the open end in the bathtub.
Make sure a white O-ring is seated inside each L-shaped connector before attaching it to the chiller.
How It Works
The submersible pump sends water from the bathtub through the filter and external pump, then into the chiller’s IN port. Once cooled, the water returns to the bathtub through the chiller’s OUT port and the return hose.
Tips
- Keep the submersible pump fully submerged before turning it on and throughout operation.
- Turn on the chiller, external pump, and submersible pump. Confirm that water flows steadily back into the bathtub.
- Keep the filter’s top air release valve closed during normal operation, and check all connections for leaks.
Get to Know Your Chiller
-
Overview
Get familiar with your chiller.

-
Specifications
Check dimensions, power, and cooling capacity.

-
What's Included
See what comes with your chiller.

-
How Your Chiller Works
Learn how your chiller cools the water and maintains your set temperature.


Troubleshooting
My Chiller Isn’t Cooling the Water
If your chiller is running and the water is circulating, but the temperature is not dropping as expected, follow the steps below to identify and resolve the issue.
1. Ensure Proper Operation: Confirm that the chiller is turned on and the water is circulating correctly. If you don't have water flow then first read this article: Why is my water not circulating?
2. Adjust Temperature Settings:
- Press & hold the POWER button to turn the unit ON.
- Adjust the temperature up or down using the arrow buttons.
The chiller should start cooling and you should hear the compressor running within 3-5 minutes. If not, proceed to the next steps.
If you keep having issues then click on this link: Contact form or contact our customer support team directly on support@plungechill.com
Why Is My Water Not Circulating?
It sounds like your chiller is running, but you’re having trouble with water circulation. Let’s work through a few steps to resolve this issue:
1. Check the Filter:
- Make sure the filter is clean and properly installed. We recommend replacing the filter cartridge every two weeks, depending on usage and water condition. If you haven’t changed your filter recently, it might be the cause of the problem.
2. Review the Setup
- Confirm that the system has been connected according to our Setup Guide, with the hoses connected to the correct IN and OUT ports.
- Make sure the hoses are not bent or blocked, all applicable tub valves are open, and all connections are securely tightened.
- Check that the O-ring is properly seated between the 3/4" L-shaped connector and the chiller port.
3. Remove Trapped Air
- Open the tub’s IN and OUT valves.
- Open the air-release valve on top of the filter and allow the filter to fill with water.
- Close the air-release valve once water begins to flow out or the water level stops rising.
Note: If the temperature on your display drops quickly but the water in the tub isn’t cooling, it’s a sign that the chiller is working, but the water circulation needs adjustment.
Cooling Performance Is Lower Than Expected
- High ambient temperatures can increase cooling time.
- Place the chiller in a shaded, well-ventilated area.
- Keep enough clearance around the air vents.
- Reduce the amount of water when appropriate.
- Set a lower target temperature.
- Keep the tub cover securely closed.
- Allow sufficient time for the water to reach the target temperature.
The Screen Displays “OFF”
If the screen shows “OFF,” the chiller is in standby mode. Unlock the screen first: hold ▲ + ▼ together for 3 seconds, then press the Power button to start.
Why is my chiller display blank?
1. Make sure the chiller is plugged into a working electrical outlet.
2. Turn on the main power switch on the back of the chiller.
3. Press and hold the Power button on the control panel to turn on the unit.
If the display remains blank, contact us at support@plungechill.com.
Why isn't the power button responding?
1. Check that the chiller is plugged into a working outlet.
2. Make sure the main power switch on the back is turned on.
If the unit still doesn't respond, record a short video showing the issue and email it to support@plungechill.com.
What do the F01 and F02 settings do?
F01 — Temperature Deviation
Controls how far the water temperature rises above your target before cooling restarts.
- Range: 1–27°F
- Default: 5°F
- Example: If your target is 45°F, cooling restarts at 50°F.
To adjust: Hold Up + Down → press Power to select F01 → adjust with Up or Down → press Power to confirm.
Keep the recommended 5°F setting. Setting it too low may cause frequent compressor cycling.
F02 — Temperature Calibration
Adjusts the displayed temperature. Normally, leave it at 0°F.
To check: Hold Up + Down → press Down to reach F02 → press Power to view the value.
If the reading is still inaccurate at 0°F, contact support before making changes.
The panel exits Function Mode after about 10 seconds of inactivity.
Why is my chiller leaking?
1. Turn off and unplug the chiller before checking connections.
2. Check that the O-ring between each 3/4-inch elbow connector and the chiller port is present, undamaged, and seated evenly.
3. Apply PTFE (plumber’s) tape to threaded fittings that require thread sealing. Keep tape off O-ring sealing surfaces.
4. Hand-tighten fittings without overtightening. Push hoses fully onto their connectors and secure the clamps.
Wipe the area dry. Scattered droplets may be condensation; continuous dripping from one connection may indicate a leak.
If leaking continues, send a short video of the affected area to support@plungechill.com.
Water Droplets on the Chiller Surface
Small water droplets on the outside of the chiller are usually condensation. This happens when warm, humid air comes into contact with the cold surface of the chiller. Wipe the surface dry and check whether the chiller is cooling normally. If it is cooling properly and no continuous water leak is found, this is normal condensation.
What should I do if my tub is leaking?
Stop using the tub and record a short video clearly showing the location of the leak.
Email the video, along with your order number and a brief description of the issue, to support@plungechill.com. Our support team will review it and assist you with the next steps.
Why is my water chiller pump & filter shaking / making a loud noise?
If your water chiller's pump is making a loud noise, it’s often due to air in the system or a lack of water flow. Here's how to address the issue and get your pump operating quietly again:
1. Check the Filter and Circulation:
- First, determine when you last changed your filter cartridge. Regular maintenance is crucial.
2. Verify and Fix Connections:
- Make sure Teflon tape is applied to all threaded connections.
- Check that the O-ring is properly seated between the 3/4" L-shaped connector and the chiller port.
- Reconnect the hoses and securely tighten all connections.
3. Remove Trapped Air
- Open the tub’s IN and OUT valves.
- Open the air-release valve on top of the filter and allow the filter to fill with water.
- Close the air-release valve once water begins to flow out or the water level stops rising.
4. Power Up:
- Plug your chiller back in and turn it on. The pump should now operate quietly once it has a steady flow of water.
Why is my water circulation slow?
If you’re experiencing slow water circulation, it’s often due to a clogged filter. Here’s how you can address and resolve the issue:
Clogged Filter: Over time, dirt and debris can clog the filter, which reduces water flow to the tubs or stops it completely. Changing the filter cartridge should help restore proper circulation.
How do I release trapped air from the filter?
Before starting, fill the tub until the water level is above the chiller's OUT port but below the tub's IN port.
1. Make sure the chiller is powered off.
2. Open both tub valves (IN and OUT).
3. Open the air release valve on top of the filter.
4. When water overflows, close the air release valve.
5. Turn on the chiller and make sure the external pump is plugged into the power socket on the back of the chiller.
6. Confirm that water is circulating smoothly.
Important: Keep the filter's air release valve closed during normal operation. Never allow the pump to run dry.
How do I clean or replace the filter cartridge?
1. Turn off the chiller, unplug the external pump, and close both tub valves (IN and OUT).
2. Open the air release valve on top of the filter to release pressure.
3. Turn the filter canister counterclockwise to open it, then remove the cartridge.
4. Rinse the cartridge thoroughly or replace it with a new one.
5. Reinstall the cartridge and tighten the canister clockwise until secure. Do not overtighten.
6. Open both tub valves and follow the filter air release steps above before restarting the chiller.
Run the noise test
To help us determine whether the noise is within the normal operating range:
- Download a sound meter app:
iPhone: NIOSH Sound Level Meter
Android: Sound Meter or Decibel X - Measure the noise from about 3 ft (1 m) away for at least 30 seconds while the chiller is running.
- Turn off nearby noise sources for a more accurate reading.
- Send us a short video showing the chiller running and the dB reading.
Our technical team will review the results. If the noise is confirmed to be abnormal and cannot be resolved, we’ll provide an appropriate solution, including replacement if necessary.
How do I send photos or videos to customer support?
Email support@plungechill.com with your order number, a brief description of the issue, and clear photos or a short video showing the problem.
If the video is too large to attach, upload it to Google Drive and include a shareable link in your email.
Our support team will review the information and help you with the next steps.
Send photos or video of a missing or damaged part
Email photos or a short video of the affected parts to support@plungechill.com, together with your product model and a description of what is missing or damaged.
Still need help?
Our support team is happy to help. Send your model and a short video so we can solve it faster.
