


Cold plunging is honestly one of the best tools out there for recovery and overall wellness. But here's the thing—keeping that water cold can get expensive fast. A lot of people start out just using ice, and then they realize pretty quickly that the cost adds up week after week.
The good news? There are smarter—and cheaper—ways to chill your cold plunge without draining your wallet.

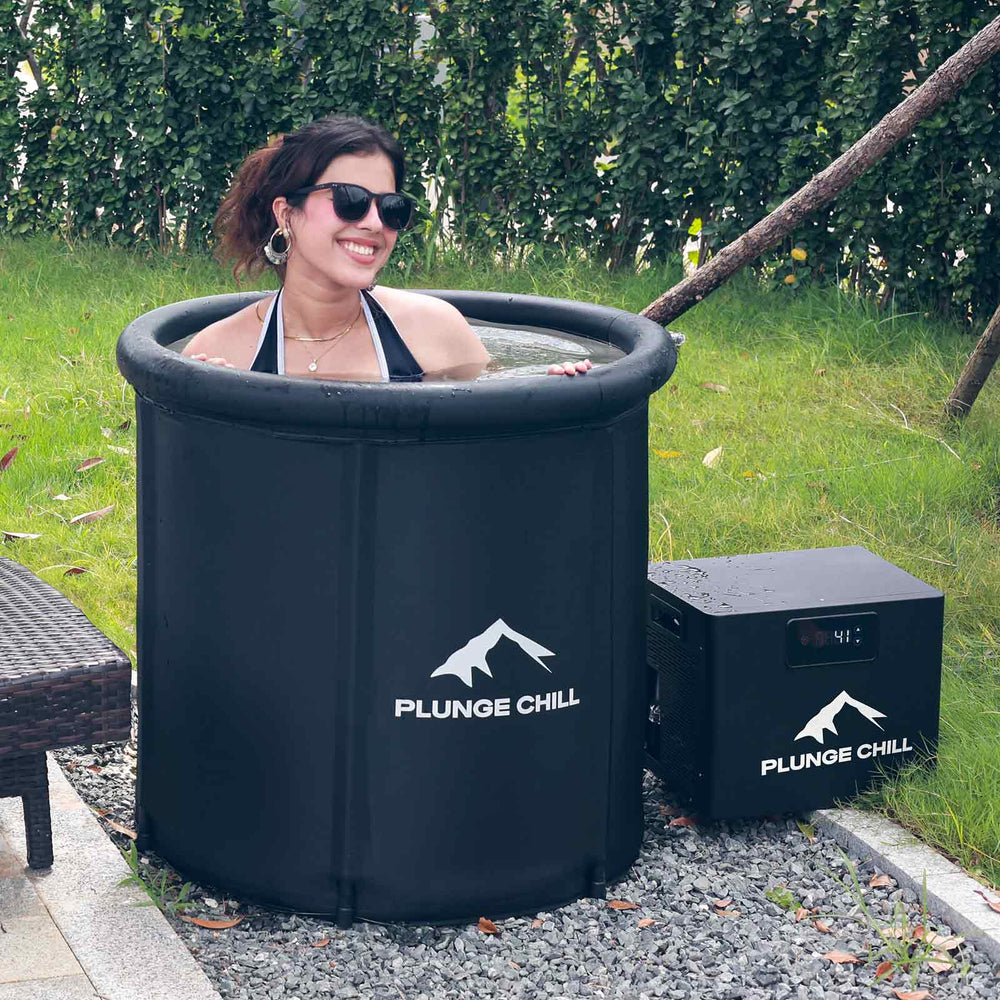
Cold Plunge Tub with Chiller
In this guide, we'll break down what a DIY ice bath actually costs you over time and show you how to save money with better long-term solutions.
Using Ice to Chill a Cold Plunge
Ice is where most people start—and honestly, it's also the most misleading when it comes to actual cost.
How Much Ice Do You Actually Need?
For a standard cold plunge tub (say, 80–120 gallons):
To get the water down to 50–59°F (10–15°C), you're looking at 20 to 40 pounds of ice (that's about 9–18 kg). If you live in a warmer climate? You'll probably need even more.
Cost
For a typical cold plunge session, the cost of ice adds up way faster than most people expect. In the U.S., ice usually runs about $3 to $6 for every 10 pounds, depending on where you shop. So if a session needs 20 to 40 pounds of ice, you're looking at roughly $6 to $24 per plunge. In most real-world cases, people end up spending around $10 to $20 per session to get the water cold enough.
That might not sound terrible at first. But once you're plunging regularly, it scales fast.
If you're doing this daily, that's about $70 to $140 per week. Monthly? You're looking at $300 to $600+.
What starts out feeling like a cheap, DIY solution ends up being one of the most expensive ways to keep a cold plunge going—especially compared to a budget cold plunge chiller. A decent chiller can often pay for itself in just a few months.
And if you're plunging every day? That means buying ice every single day.
Here's the kicker: the bigger your tub, the more ice you need—especially when summer rolls around.

Using a Budget Cold Plunge Chiller
If you're thinking long term, a cold plunge chiller is hands down the most cost-efficient way to go.
Best Affordable Chillers
Budget-friendly chillers usually come with:
- 1/4 HP to 1/3 HP compressors.
- Enough cooling power for home tubs (up to about 120 gallons).
- Plug-and-play setup—nothing complicated.
This is the sweet spot for beginners who want good performance without spending a fortune.

COLD PLUNGE CHILLER
Best Budget Cold Plunge Chillers
Plunge Chill 1/3 HP Ice Bath Water Chiller with Pump & Filter
This all-in-one 1/3 HP chiller is probably the best value out there right now for beginners:
- Cools water down to about 39°F (3–4°C).
- Comes with pump, filter, and hoses—no extra parts to buy.
- Works with most tubs under 80–120 gallons.
- Genuinely plug-and-play.
Why it's the best:
You skip all those hidden DIY costs—pump, filter, fittings, the works. That makes it the lowest real total cost you're going to find.

Cold Plunge Chiller + Tub (MAX)
The Pod Company The Universal Ice Bath Chiller
Standard chiller: 1/3 hp compressor, 280 watt power consumption. Uses a regular 110V US plug. ~39-45db noise level (comparable to a fridge).
Water pump & filtration: 20 micron filtration & 24/7 water flow which maintains clean & clear water for weeks to months. The filter and pump is placed low on the side with easy access for filter replacement and in case repair is needed, covered by our warranty, naturally.
Nuvio Recovery Chiller Pro
- Save Money & Time On Ice
- New & Enhanced Cooling Down to 37°F
- Works With Any Bath Tub/Ice Bath
- Ozone Purification & Built-In Filtration
- Control On The Go With Our FREE App
Pros and Cons vs Ice
Pros:
- No more buying ice over and over again.
- Saves you money in the long run.
- You get precise control over the temperature.
- Continuous cooling means the water stays cold the whole time.
Cons:
- Costs more upfront (expect to spend $300–$800).
- You'll need an outlet nearby.
Most people break even within 1 to 3 months compared to buying ice. After that, you're just saving money.
DIY Methods to Chill Your Cold Plunge
If you're really trying to save money upfront, DIY setups can work—but they've got some serious downsides.
Mini Fridge / Pump Setup
How it works:
You hook up a water pump to move water through tubing that runs inside a mini fridge or freezer.
Pros:
- Cheap to get started
- Kind of a fun project if you're into tinkering
Cons:
- Doesn't cool very well
- You might end up breaking the fridge
- Not reliable enough for daily use
Bottom line: This is fine for the occasional plunge, but don't count on it for consistent cold therapy.
Other Creative Methods
- Freeze your own ice: Doable, but it takes forever and eats up freezer space.
- Chill water overnight: Only works if the weather cooperates (and usually, it doesn't).
- Use insulated covers: Helps keep cold in, but doesn't make the water colder.
- Rotate frozen water bottles: Better than nothing, but still a hassle.
Look, these tricks can help cut costs a little. But they won't fully replace a real cooling system.
Ice vs Chiller: Cost Comparison
| Method | Upfront Cost | Monthly Cost | Effort Level | Long-Term Value |
|---|---|---|---|---|
| Ice | Low | High ($300+) | High | ❌ Poor |
| DIY Cooling | Low | Medium | High | ⚠️ Limited |
| Chiller | Medium | Low | Low | ✅ Best |
If you plan to cold plunge regularly, a budget chiller is the cheapest option over time.
Here's what a lot of people don't realize until they're a few months in: cold plunging isn't a one-time setup—it's a recurring cost habit. Ice feels cheap at first. But that daily expense adds up fast, and before you know it, you're spending a pretty significant chunk every month just to keep your water cold.
A budget chiller flips the script. Instead of ongoing purchases, you make a one-time investment. That dramatically lowers your long-term costs.
Over time, the savings really start to show. You're not constantly buying ice, hauling bags, or refilling. The chiller just runs—automatically, consistently, with minimal effort. Plus you get precise temperature control, which makes your recovery more stable and effective.
But here's the bigger picture: a chiller makes cold plunging actually sustainable. No more store trips. No prep. Just turn it on and plunge whenever you want. For anyone serious about recovery or daily use, a budget chiller isn't just cheaper—it's the smarter long-term move.

Tips to Reduce Cold Plunge Costs
Keeping your cold plunge affordable isn’t just about choosing ice vs. a chiller—small optimizations can make a huge difference over time. Here’s how to effectively reduce your ongoing costs:
Use a cover to prevent heat gain
A well-insulated cover helps block sunlight and warm air, keeping your water colder for longer.
Less heat gain means less ice usage or reduced chiller runtime.
Keep your tub in a shaded area
Direct sunlight can quickly increase water temperature, especially in warmer climates.
Placing your tub in a shaded area or indoors can reduce cooling demand by 30–50%.
Start with cold tap water
Fill your tub during cooler times of the day, such as early morning or late evening.
Starting with colder water reduces the amount of cooling needed.
Limit full water changes
Draining and refilling frequently increases both water and cooling costs.
Instead:
- Use a filter system
- Add basic water treatment (e.g., hydrogen peroxide or sanitation tablets)
Cleaner water lasts longer and requires less maintenance.
Use a smaller tub (less water = less cooling needed)
Larger tubs require more energy and more ice to cool.
For solo users, a compact tub can reduce cooling costs by 20–40%.
By combining these strategies, you can significantly reduce both ice expenses and electricity costs—making cold plunging much more cost-efficient in the long run.
FAQs
1. What's the cheapest way to cool a cold plunge?
Short term? Ice. Long term? A budget chiller ends up being cheaper.
2. Is a cold plunge chiller really worth it?
Yeah—especially if you're plunging more than 3 or 4 times a week.
3. Can I just use my bathtub for cold plunging?
You can, but keeping the water cold without a chiller is a pain.
4. How cold should the water actually be?
Typically around 50–59°F (10–15°C) for the best benefits.
5. How can I use less ice?
Insulate your tub, keep it in the shade, and start with pre-cooled water. That'll cut down how much ice you need.




Leave a comment