


Cold plunging has quickly become one of the go-to recovery methods for athletes, fitness enthusiasts, and anyone seeking post-plunge mental clarity. Less soreness, better circulation, and heightened resilience make the benefits undeniable.
However, many beginners assume they need an expensive $2,000+ commercial setup just to get started. In reality, you don't.
You can comfortably establish a consistent cold therapy routine at home without excessive costs. A budget cold plunge chiller delivers reliable cooling, straightforward installation, and steady temperatures. For beginners, a simpler, affordable setup is often the smarter approach.
This guide walks you through selecting a budget chiller, reviews five accessible beginner options, and evaluates the financial benefits of automated cooling versus buying retail ice.

COLD PLUNGE CHILLER
How to Pick a Budget Cold Plunge Chiller
Prioritizing the right core features ensures reliable cooling performance on an entry-level budget.
1. Cooling Power
Cooling power is measured in horsepower (HP) or compressor wattage.
For personal home use, a 1/3 HP chiller handles tubs under 120 gallons effectively, lowering water temperatures to the optimal 39–52°F (4–11°C) recovery zone.
2. Temperature Range
Beginners often start at 50–55°F before progressing to colder ranges. Choose a chiller with adjustable digital controls to adapt temperature settings as your tolerance builds.
3. Filtration System
An integrated filter and continuous circulation pump keep water clear, preventing frequent draining and refilling cycles.
4. Noise Level
For setups in garages, patios, or home gyms, operating volume is an important factor. Reliable budget units operate around 40–50 dB, comparable to a quiet refrigerator hum.
5. Installation Simplicity
A plug-and-play unit with quick-connect hoses and a standard electrical plug minimizes setup time and eliminates complex plumbing work.

Budget Chiller vs Ice
While adding bags of ice to a tub works as a short-term trial, recurring use reveals clear practical differences.
| Feature | Ice Bath Method | Active Chiller System |
|---|---|---|
| Setup Time | 30–45 minutes per plunge | Instant, ready on demand |
| Temperature Control | Fluctuates and warms quickly | Maintains exact set temperature |
| Maintenance | Frequent draining & ice runs | Continuous circulation & filtration |
| Long-Term Cost | $800–$1,500/year on ice bags | Low monthly electric utility cost |
5 Best Budget Cold Plunge Chillers
These five chiller configurations offer balanced price, cooling efficiency, and ease of use for residential setups.
1. Best All-Around: 1/3 HP Chiller
A 1/3 HP unit represents the ideal balance of power, efficiency, and size for home setups.
- Actively cools water without ice runs.
- Maintains temperatures between 39°F and 52°F.
- Compatible with standard portable and inflatable plunge tubs.
- Includes built-in filtration for lower water maintenance.
Best for: Daily home plunge routines, personal gyms, and standard-sized recovery tubs.

2. Best Under $500
Sub-$500 entry-level units offer accessible active chilling for personal tubs under 100 gallons.
- Compact footprint for smaller spaces.
- Straightforward digital temperature adjustment.
- Efficient power consumption for low running costs.
Best for: First-time plunge users and small personal tubs.
3. Best Portable Chiller
Lightweight, compact units designed for temporary placement or mobile setups.
These models pair seamlessly with portable inflatable tubs, making them suitable for renters or multi-location use.
Best for: Apartments, seasonal outdoor decks, and temporary recovery areas.
4. Best DIY Setup
Building a DIY system with stock tanks, external inline pumps, or adapted chillers offers customization at a low initial price.
- Requires basic plumbing and hose-clamp assembly.
- Demands manual monitoring of water cleanliness and flow rates.
Best for: Hands-on builders looking for maximum customization.
5. Best Beginner Plug-and-Play
Complete all-in-one systems include the compressor, circulation pump, filtration housing, and quick-connect hoses. Assembly typically requires 10–15 minutes.
Best for: Beginners who want an immediate, reliable setup without technical troubleshooting.

Recommended 1/3 HP Cold Plunge Chiller
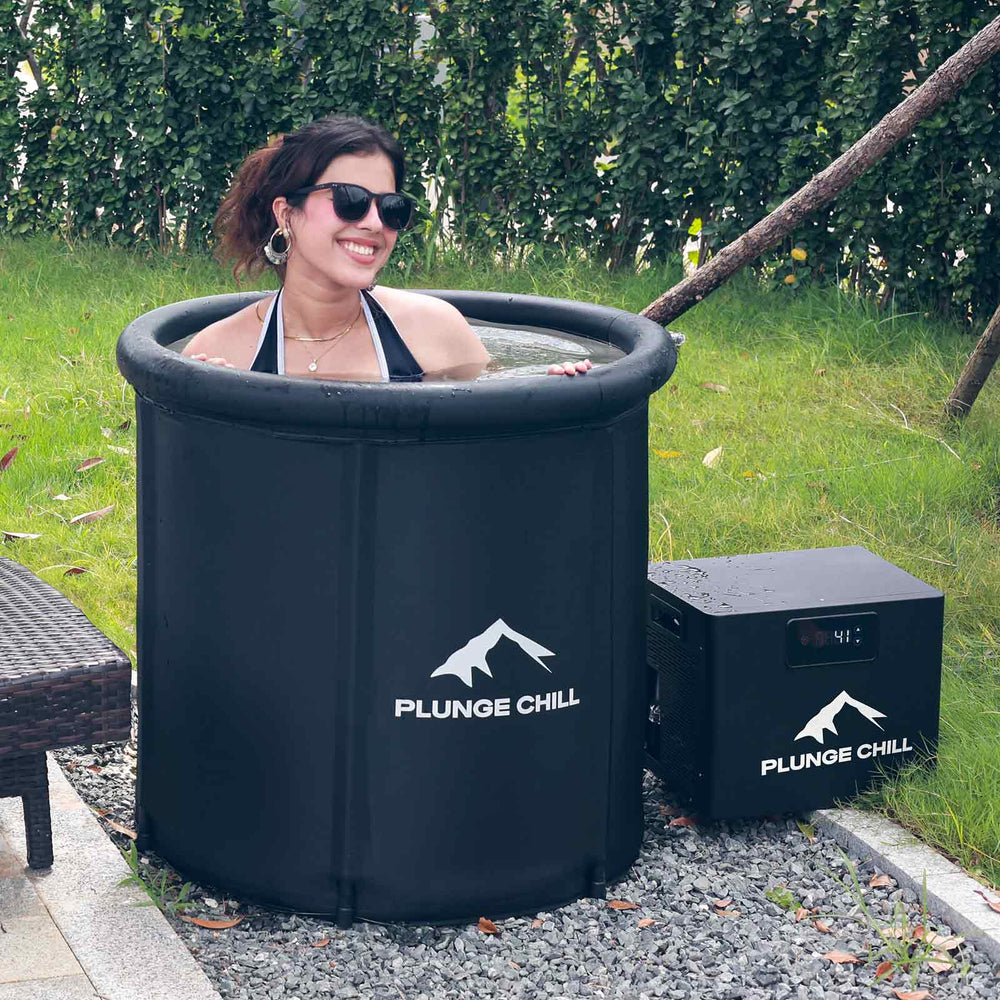
Plunge Chill Cold Plunge Chiller
Price: $499
Powerful 1/3 HP Cooling — No Ice Needed
Equipped with a 600W compressor, this unit reliably cools water down to targeted recovery temperatures. In tested 66-gallon setups, water cools from 75°F to 50°F in 8–10 hours and to 45°F in 12–14 hours. Pre-cooling overnight ensures the tub is chilled and ready for morning sessions.
Ultra-Quiet Operation for Home Use
Operating at 39–45 dB, the compressor runs quieter than most residential refrigerators, making it suitable for home gyms, garages, or outdoor patios.
All-in-One Cooling with Built-in Filtration
The integrated circulation pump and mesh filtration system continuously capture debris, maintaining clean water and extending intervals between water changes.
Beginner-Friendly Plug-and-Play Setup
Quick-connect fittings allow assembly in minutes. The digital touchscreen interface provides straightforward "set and forget" temperature management.
Compact, Portable & Energy Efficient
Weighing 35 lbs with a 14.9" × 11.8" × 12.6" footprint, this unit pairs with inflatable tubs, stock tanks, and DIY setups at an operating cost of roughly $0.80–$1.50 per day.

1HP COLD PLUNGE CHILLER
The Universal Ice Bath Chiller
Cools immersion tubs down to 39°F (3°C) with universal fittings, quick 10-minute setup, and integrated 20-micron filtration suitable for both indoor and outdoor placement.
- ✔ Compatible with standard plunge tubs and stock tanks
- ✔ Rapid setup with included quick-connect hoses
- ✔ Multi-stage filtration for clean water circulation

Is a Budget Cold Plunge Chiller Worth It?
For most home recovery routines, an entry-level chiller is a practical, high-value investment:
- Consistent Temperature: Delivers repeatable recovery conditions without ice-melt warming.
- Daily Convenience: Eliminates store trips, heavy lifting, and ice prep time.
- Financial Return: Offsets its cost within 8–12 months compared to recurring retail ice purchases.
Frequently Asked Questions (FAQs)
What temperature should beginners start at?
Most beginners start between 50°F and 55°F (10–13°C), providing an effective stimulus while allowing the body to adapt. As tolerance increases, temperatures can be gradually lowered toward 40–45°F.
How long should a cold plunge last?
For beginners, 2 to 5 minutes provides full recovery benefits. Once acclimated, sessions can range between 3 and 10 minutes depending on individual tolerance and water temperature.
Do cold plunge chillers use a lot of electricity?
Most 1/3 HP chillers draw 500–700W during active cooling, similar to a standard refrigerator. Once the set point is reached, power consumption drops significantly, averaging $10–$25 per month.
Can I use a chiller with an inflatable tub?
Yes. Most active chillers connect directly to standard 1/2" or 3/4" ports found on inflatable plunge tubs and portable ice barrels.
How often do I need to change the water?
With integrated circulation and regular filter rinsing, water typically remains fresh for 2 to 4 weeks between full changes.




Leave a comment